Paint alone can’t prevent peeling when moisture is trapped in the wall or the coating layers don’t bond. Understanding how to prevent paint peeling in high humidity starts with resolving dampness, preparing a clean, dry surface and choosing compatible primer and paint. A moisture-resistant coating can help in suitable areas, but it won’t fix active seepage.
When paint bubbles, flakes or comes loose, it’s natural to look for a more durable finish. But the result depends just as much on what lies beneath: condensation, leaks, residue or an unsuitable earlier coating can weaken adhesion and cause fresh paint to fail.
This guide explains how humidity affects painted walls, what paint can and can’t do, and how cleaning, drying, priming and layer compatibility support a more reliable finish. It also shows how to distinguish a preparation issue from moisture that must be addressed before repainting.
Key Takeaways
- Identify whether peeling is linked to condensation, leaks or moisture entering through exterior walls before choosing a coating solution.
- Reduce indoor moisture with effective ventilation and address leaks before repainting, so dampness doesn’t undermine the finish.
- Prepare walls by removing loose paint, cleaning residue and allowing the surface to dry before primer and paint are applied.
- Use compatible layers and suitable primer to support adhesion; a new topcoat can’t make an unsuitable or damp base reliable.
1. Can Paint Alone Prevent Peeling?
Paint alone can’t stop peeling when moisture weakens the bond between the coating and the wall. Condensation near a window, a plumbing leak or seepage through an exterior wall can leave moisture behind the paint film. Look for damp patches, bubbling, discolouration, powdery deposits or flaking paint. A premium topcoat won’t fix those underlying conditions. To prevent paint peeling in high humidity, find and address the moisture source before repainting.
What temperature and humidity range do paint manufacturers recommend? The suitable application range varies by paint formulation, so follow the product label or technical data sheet for its specified conditions. Painting outside that range can affect drying and adhesion. In a Dubai interior, assess the actual room conditions rather than relying on outdoor weather alone. Indoor air and wall surfaces can differ.
How can you measure humidity before painting? Use a hygrometer to measure relative humidity in the room, taking readings near the affected wall before work begins. A wall moisture meter measures moisture in the substrate, not room humidity. Check both when dampness is suspected. Repeat readings after a leak repair or ventilation change, and don’t cover a wall that remains damp.
Choose moisture-resistant or mold-resistant paint for areas exposed to condensation, such as kitchens and bathrooms. Washable interior paint can make routine cleaning easier, but it won’t make a damp surface suitable for painting. Match the primer and paint to the wall material and room conditions. Check around windows, plumbing, ceilings and air-conditioning units for recurring damp spots, then repair leaks or seepage at their source. Run an exhaust fan during and after showers to remove humid air. Repaint only when the moisture problem is resolved and the wall is clean and dry.
2. Why Does Interior Paint Peel in Humid Conditions?
Indoor humidity can slow drying and leave fresh paint soft. Shower steam raises moisture in bathrooms unless an exhaust fan removes it. Cooking releases steam, while grease can settle on nearby kitchen walls. Poor airflow keeps moisture and airborne residue close to surfaces. During humid weather in the UAE, condensation can also affect windows and adjacent walls. Over time, these conditions can weaken the finish even without an obvious leak.
Fix water sources before painting. Roof seepage, plumbing leaks and water entering through exterior walls keep materials damp, so repainting without repairs leaves the cause in place. Drying clothes indoors can also add moisture to rooms. A dehumidifier can help manage indoor moisture when ventilation alone isn’t enough. Use it in the affected room, especially where windows stay closed and airflow is limited. Keep ventilation paths clear so humid air can escape instead of collecting around painted surfaces.
What humidity level is safe for painting indoors and outdoors? There isn’t one humidity limit for every paint because application conditions vary by product. Follow the paint’s label or technical data sheet, including its specified humidity and temperature range. For exterior work, assess the wall and local conditions as well as the surrounding air.
How can you improve ventilation and reduce indoor humidity while painting? Run bathroom exhaust fans during and after showers, and use a kitchen chimney while cooking. Open windows for cross-ventilation when outdoor air is suitable, and use a dehumidifier if indoor moisture persists. Allow air to circulate around the work area while each coat dries. Avoid trapping humid air in a closed room.
Can you paint during humid weather in the UAE, and what local conditions should you consider? Painting can proceed when the product’s application conditions are met and the wall is dry. Dubai’s outdoor humidity doesn’t show the moisture level inside an air-conditioned room, so assess both the room and the surface. Check for condensation near windows, air-conditioning units and exterior walls. If the wall remains damp or a leak continues, address the cause before applying a new finish.
3. Preparing, cleaning and drying walls before painting
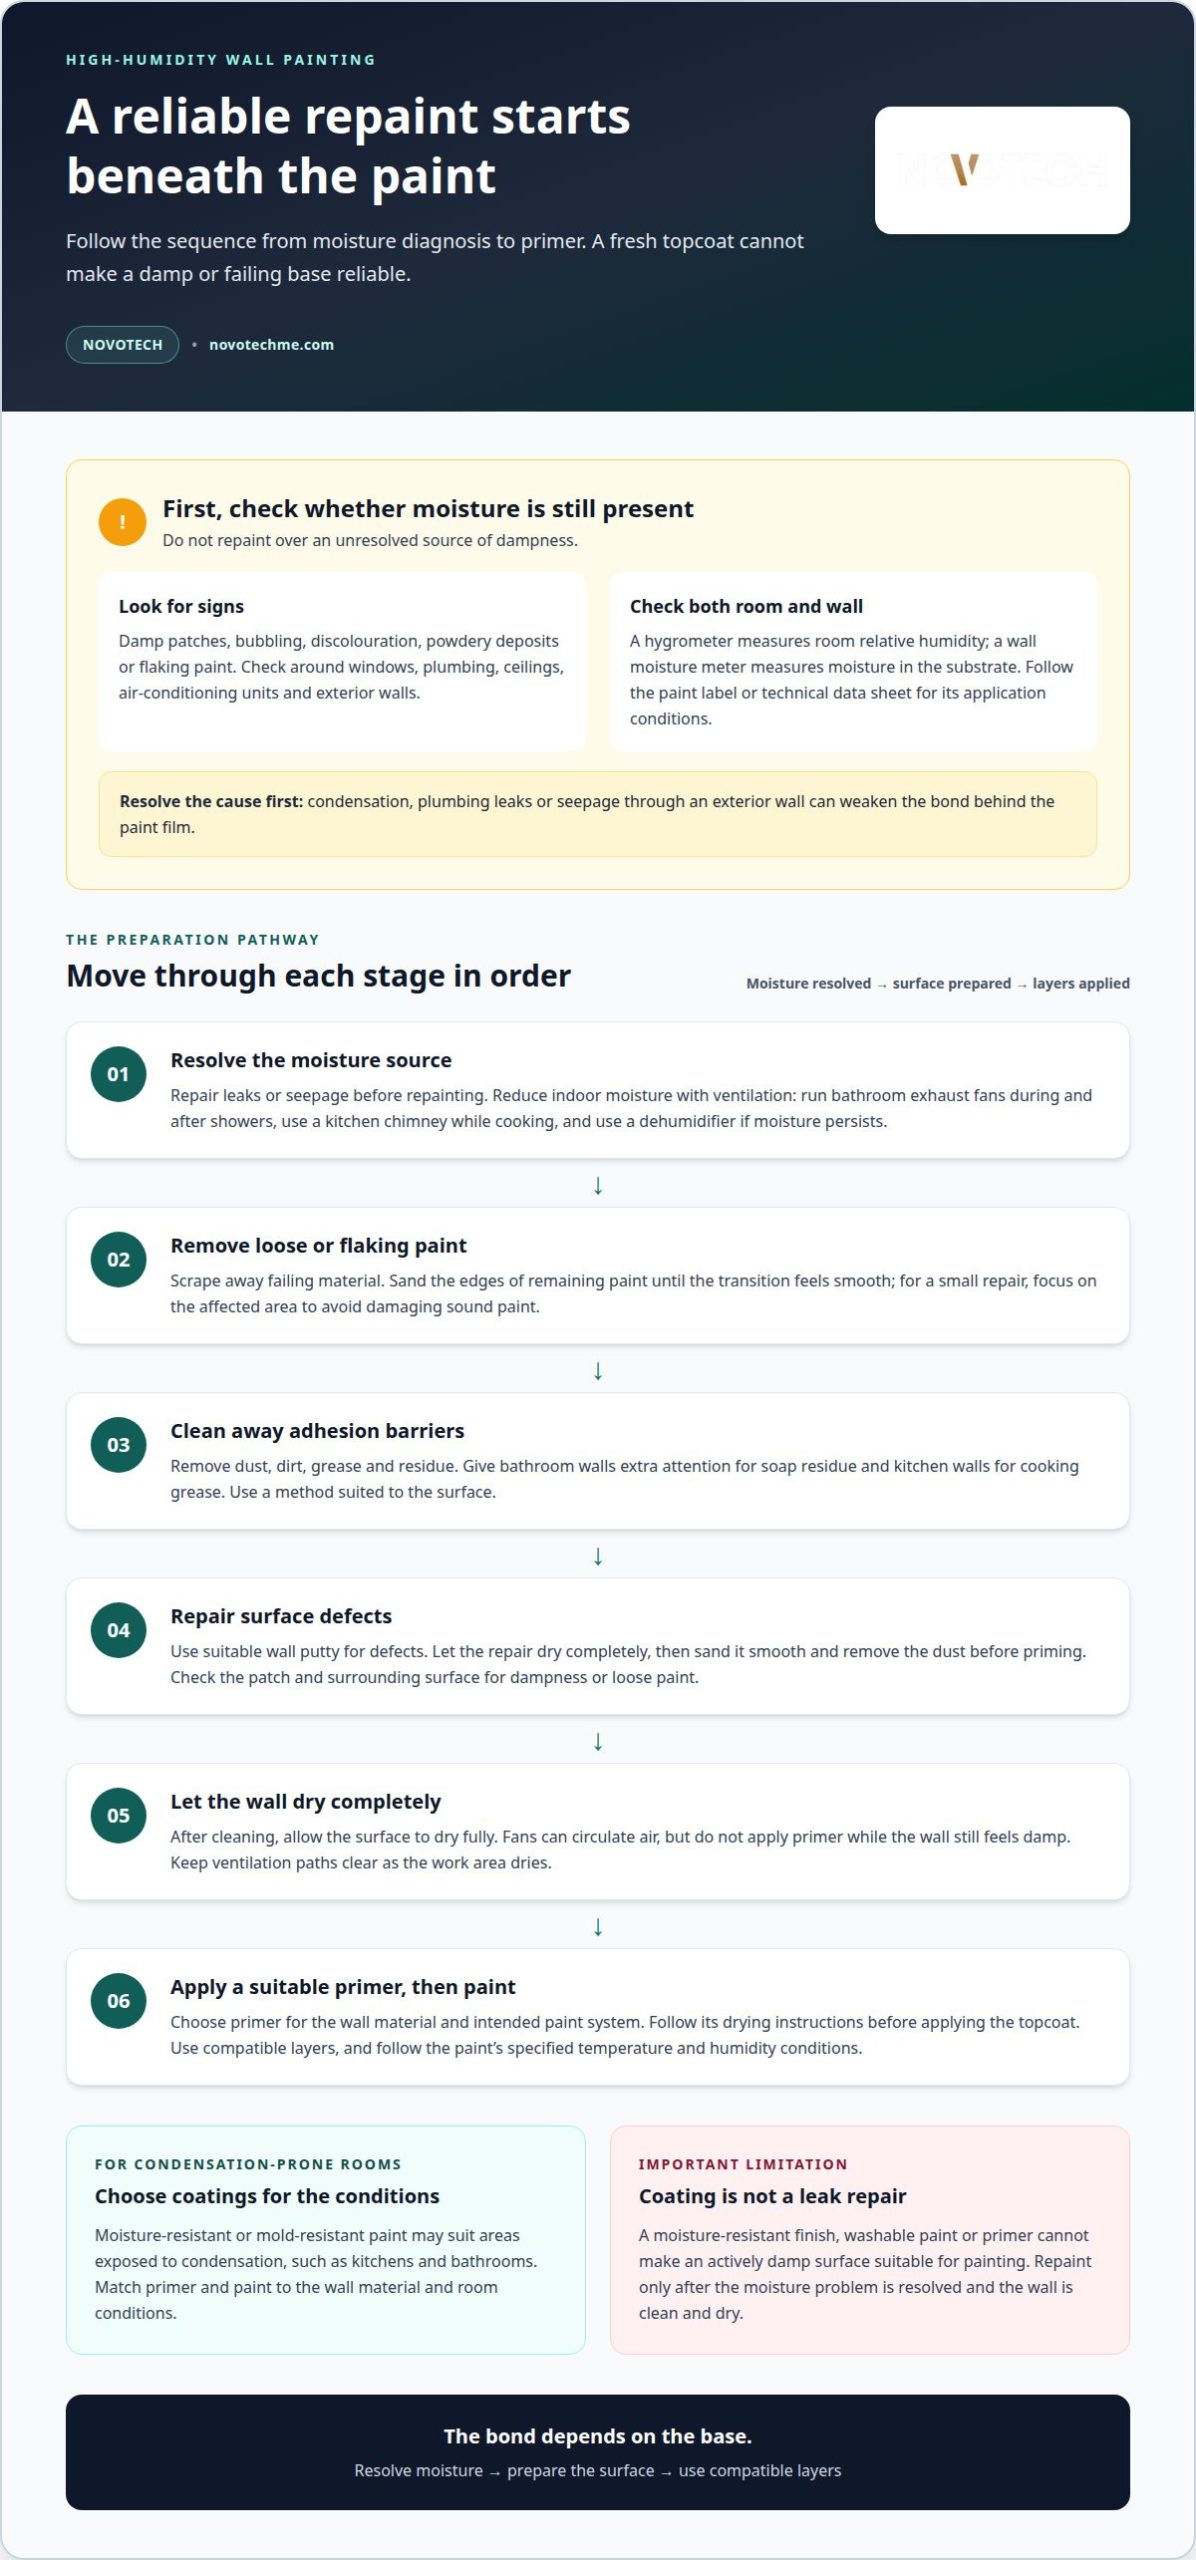
Painting over damp walls, condensation or visible mold can weaken adhesion and lead to bubbling, flaking or renewed peeling. A fresh coat may temporarily hide a moisture mark, but it won’t resolve the dampness beneath. In an interior room, identify and address the moisture source before preparing the surface.
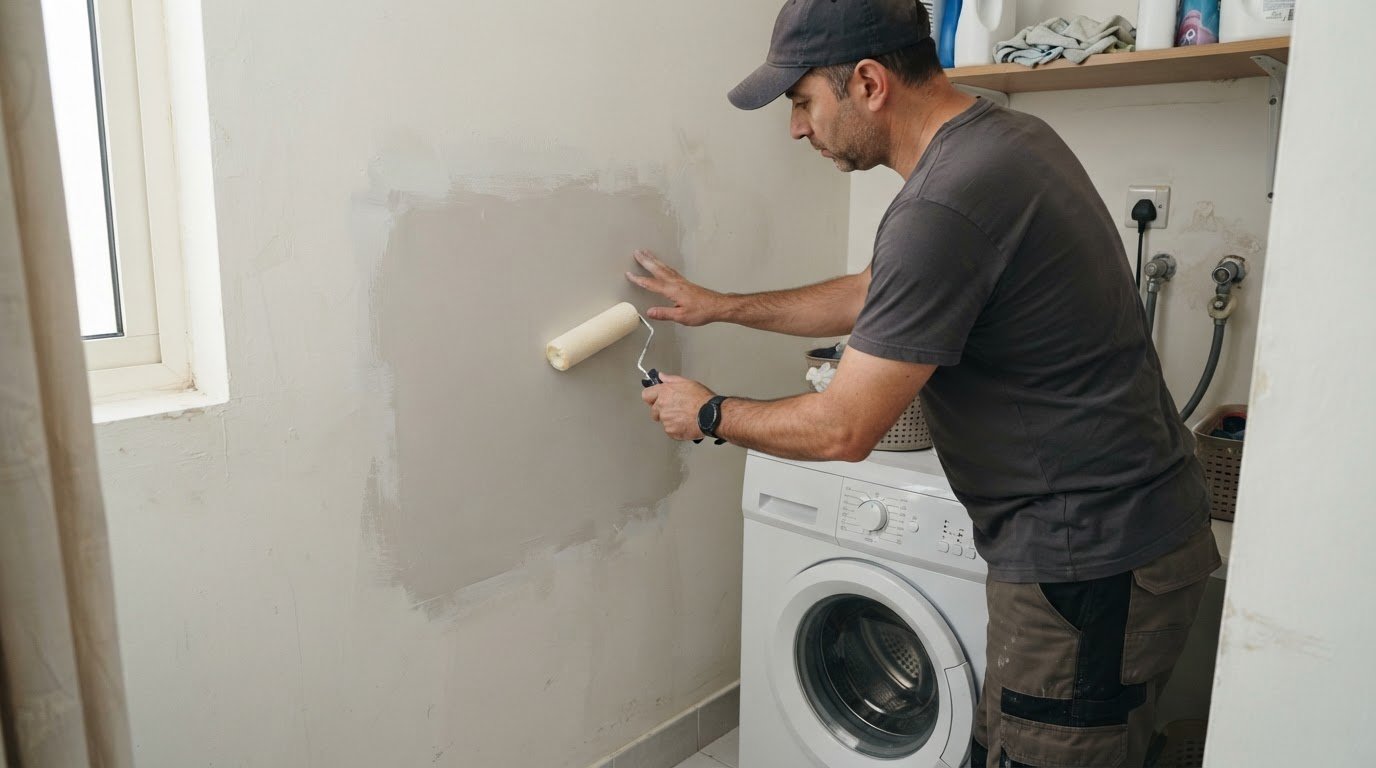
Start by scraping away loose or flaking paint. Sand the edges of the remaining paint until the transition feels smooth, then remove the dust. This creates a more even surface for primer and helps prevent loose material from disrupting the new coating. For a small repair, focus sanding on the affected area to avoid damaging sound paint around it.
Clean the wall to remove dust, dirt, grease, soap residue and anything else that could interfere with adhesion. Bathroom walls may need extra attention to soap residue, while kitchen walls can collect cooking grease. Use a cleaning method suited to the surface, then let it dry completely. Fans can help circulate air, but don’t apply primer while the wall still feels damp.
After cleaning, repair surface defects with suitable wall putty. Let the repair dry completely before sanding it smooth, then remove the dust before priming. Rushing this sequence can leave a weak or uneven base, especially where repairs meet the existing wall. Check the repaired patch and surrounding surface for loose paint or dampness.
Apply a primer suited to the wall material and intended paint system. Primer creates a consistent base, but it can’t fix active water seepage. Follow the product’s drying instructions before applying the topcoat, and keep the room ventilated while it dries. Use this sequence for thorough preparation: resolve moisture, remove failing paint, clean, repair, dry, sand, remove dust, then prime. Each step supports the bond of the next layer.
4. Compatibility between paint layers
A new coat depends on its bond with the underlying surface. If the existing paint and new coating are incompatible, the fresh layer may not adhere reliably. Peeling can follow even when the wall looks clean and dry. For example, applying a different paint type over a smooth, glossy finish can create a weak bond unless the surface is prepared properly.
Identify the existing coating and check the new paint’s product instructions. The label or technical data sheet explains which surfaces and primers the paint is designed for. Don’t assume two coatings will bond just because both are suitable for walls. A primer selected for the existing surface and intended topcoat can provide a more suitable transition between layers.
Surface condition also affects compatibility. Glossy or smooth paint gives a new coat little texture to grip. Lightly sand the surface, remove the dust and apply the specified primer where needed. On a repaired patch, primer helps create a consistent base between exposed wall material and the surrounding paint. It won’t compensate for active moisture or loose underlying layers.
Allow each applied layer to dry according to its product instructions before adding the next. The general guidance in this article recommends waiting 4-6 hours between paint coats, while the product’s own directions should determine the appropriate interval for that coating. Applying another layer too soon can disrupt drying and weaken the finish. On smooth surfaces, light sanding between coats can help the next layer adhere; remove sanding dust before continuing.
Treat primer, paint and the existing finish as one coating system, not separate choices. A compatible system supports adhesion from the wall outward, while a mismatch can weaken the bond between layers. The key is to identify the underlying surface, match primer and paint to it, and follow the product instructions for preparation and drying.
NovoTech: Anti-Corrosive Paint Solutions
NovoTech provides Anti-Corrosive Paint Solutions for projects where exposed building surfaces need protective coatings. If paint is peeling, first address the moisture and prepare the substrate. A protective coating cannot replace fixing active leaks or applying compatible layers.
For buildings in Dubai and across the UAE, NovoTech provides Exterior Building Painting Services and high-rise exterior painting, with systems suited to the project’s surface and conditions. Interior Painting Solutions support indoor repainting once moisture issues are resolved and walls are properly prepared. The right scope depends on where the coating is failing and what is affecting the surface.
If peeling affects your property, contact NovoTech to discuss the painting work required.
Plan the Next Coating for Long-Term Performance
Make the next repaint a considered maintenance decision, not just a cosmetic reset. Note where peeling appears, whether it returns after repairs, and how the affected area relates to windows, plumbing or exterior walls. This pattern can help distinguish a local failure from a broader building issue and guide the right scope of work.
Preventing paint peeling in high humidity means treating the wall, primer and finish as a connected system. If the affected surface is part of a villa, NovoTech’s Villa Painting & Exterior Finishes can support the project once the underlying moisture issue is addressed. The next step is a painting plan that accounts for the surface condition and coating system, rather than simply covering visible damage.
Contact NovoTech for painting advice about your property’s requirements. A clear assessment can help you move from recurring peeling toward a more carefully planned finish.
Frequently Asked Questions
Can Paint Alone Prevent Peeling?
No. Paint can’t stop peeling if moisture continues to enter the wall or the existing coating has a weak bond. Moisture-resistant paint can suit condensation-prone rooms, while washable paint helps with routine cleaning. Neither replaces repairing a leak or preparing a sound base. For example, bathroom paint may still fail if dampness persists behind the wall surface.
How long should I wait between coats?
Allow 4-6 hours between coats as a general guide, then follow the specific paint’s label or technical data sheet. Drying conditions and the formulation affect when another coat can be applied. Before recoating, check that the previous layer has dried as directed. Applying a fresh coat too early can interfere with the finish and its bond to the layer beneath.
Should I remove flaking paint?
Yes. Scrape away loose or flaking paint before repainting because a new coat can’t reliably adhere to paint that has already detached. Focus removal on unstable areas, then sand the edges to create a smoother transition. For example, if a small patch flakes near a window, remove loose paint around it rather than painting over raised edges.
Why Does Interior Paint Peel in Humid Conditions?
Interior paint can peel when moisture weakens its bond with the wall or poor airflow interferes with proper curing. Bathrooms can collect shower steam, while kitchens produce cooking vapour and grease. Condensation near windows can affect nearby paint too. Look for a pattern: peeling concentrated around a window may point to a different moisture pathway than damage beside plumbing.
How does high humidity cause paint to peel or fail to dry?
Humid air and condensation can add moisture to the wall and paint film, weakening adhesion. Limited airflow can also leave fresh paint soft for longer and make bubbling or peeling more likely. Conditions around the painted surface matter, not just how the room feels. A poorly ventilated bathroom after a shower is one example of prolonged moisture exposure.
How should surfaces be cleaned, dried, and prepared to prevent peeling?
Remove loose paint, then clean away dust, grease, soap residue and other contaminants that could disrupt adhesion. Let the surface dry fully before applying primer. Remove sanding dust before coating, and if you use wall putty, let it dry before sanding the repair smooth. For example, kitchen walls need grease removed as well as ordinary dust before repainting.