What if the white marks on your wall aren’t a paint problem at all? Efflorescence is a sign that moisture has carried salts to the surface, so painting over it can lead to peeling paint or deposits that soon return. If you’re researching how to treat efflorescence on walls before painting, address both the visible salts and the moisture pathway behind them.
Efflorescence can be mistaken for mould or another surface problem. This guide explains how to identify it, remove loose salts, allow the wall to dry, and check whether it is ready for paint. It also covers what to investigate when the moisture source isn’t obvious and when persistent dampness or widespread damage calls for a broader assessment. In Dubai, wall preparation should start with the condition of the surface, not simply a fresh coat of paint. NovoTech brings more than 30 years of painting and building maintenance experience to residential, commercial, and industrial projects where wall condition and preparation matter.
Key Takeaways
- Efflorescence signals that moisture has moved through a wall, but the deposits alone don’t identify its source.
- Learn how to treat efflorescence on walls before painting by choosing a cleaning method suited to the surface and avoiding unnecessary moisture.
- Protect the area, remove loose salts, clean selectively, and reassess the wall before painting.
- Check that the surface is stable, free of loose deposits, adequately dry, and showing no signs of active moisture.
- Recurring deposits, persistent dampness, crumbling plaster, or repeated paint failure call for a wider assessment.
How to Treat Efflorescence on Walls Before Painting: Identify the Cause First
Before choosing a cleaning method, consider what the deposit indicates and where moisture could be entering or lingering. Efflorescence is a visible salt residue left when moisture moves through masonry or plaster, dissolves soluble salts, and carries them towards the surface. As the moisture evaporates, the salts may remain as a dry, powdery or crystalline layer. The process is described in more detail in Efflorescence on Wikipedia.
The residue is a symptom, not a diagnosis of one specific defect. Water ingress, a plumbing leak, air-conditioning condensate, or moisture retained during construction can all be possible factors. The cause depends on the wall and site conditions, so don’t treat a patch of white deposits as proof of a particular leak.
What causes white salt deposits on painted or plastered walls?
Moisture can pass through porous masonry, mortar, or plaster and transport dissolved salts. When it reaches the surface and evaporates, the salts may become visible. On a painted wall, the paint may already be blistering or flaking, but that damage alone doesn’t reveal the moisture source. Understanding how to treat efflorescence on walls before painting starts with investigating the wall, not simply covering the marks.
Is it efflorescence, mould, or another wall problem?
Efflorescence often looks dry, pale, and powdery or crystalline, but appearance alone can’t confirm what’s on a wall. Mould may have a different, irregular or fuzzy appearance and needs a separate assessment and treatment approach. Damp staining may appear as discoloured patches, while paint failure can show as blistering, peeling, or flaking. These signs can overlap, so don’t rely on a quick visual check to diagnose the cause.
Photograph the affected area, then carefully dry-brush a small section and note whether the deposit returns. Recurrence is useful information, but it doesn’t identify the source by itself. In Dubai, use a site-specific checklist to guide inspection:
- Exposure: Check whether the wall is near an exterior façade, window, balcony, roof, or another area exposed to water.
- Plumbing: Note nearby pipes, bathrooms, kitchens, or other plumbing routes that may need closer inspection.
- Air-conditioning condensate: Check nearby units, drain lines, and condensate discharge for signs of dripping or water tracking along the wall.
- Water ingress: Look for visible gaps, damaged finishes, or areas where water may enter.
Removing salt cleans the symptom; correcting the moisture source addresses the condition that can bring it back. Make inspection part of paint preparation. NovoTech’s painting and building maintenance work brings wall condition, moisture concerns, and surface preparation into the project before new coatings are applied.
Compare Efflorescence Removal Methods Before Choosing a Wall Treatment
Choose a cleaning method based on how firmly the salts cling, the wall’s condition, and whether the surface is dry. Water or a strong cleaner may seem faster, but adding moisture can complicate preparation and delay painting. The National Research Council Canada’s information on efflorescence in masonry explains how salt solutions and evaporation contribute to efflorescence, reinforcing the value of avoiding unnecessary wetting.
Dry brushing: Suitable for light, loose deposits on a dry, sound surface. It adds no water, but may not remove salts bonded to the wall.
Limited damp-cloth cleaning: Consider this for small areas of residue left after brushing. Use as little water as practical, since excess moisture can spread salts or soak into porous plaster and masonry.
Compatible specialist cleaner: Consider this when deposits resist dry brushing and the product is suitable for the substrate. Cleaner formulations and instructions vary, so confirm compatibility before use.
When is dry brushing enough to remove efflorescence?
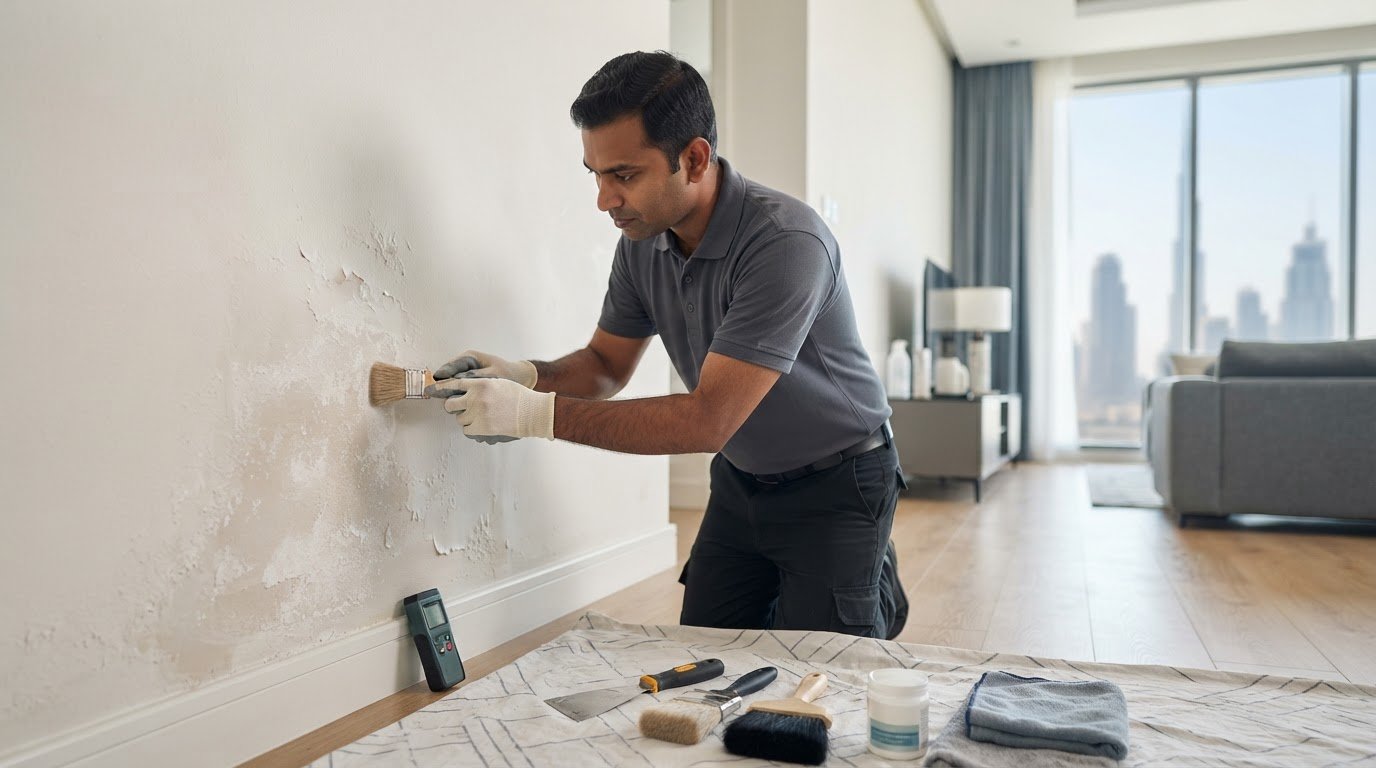
For a dry wall with a light, powdery deposit, use a stiff, dry brush and work gently to lift the residue rather than grind it into the surface. Protect nearby floors and finishes, and collect the loosened salts instead of sweeping them across adjacent areas. Wear suitable eye and respiratory protection if brushing creates dust. After cleaning, check the wall and monitor whether deposits return.
When should you use water or a specialist cleaner?
If brushing leaves stubborn deposits, test a small, inconspicuous area with a lightly damp cloth or a cleaner intended for the wall material. Let the test area dry, then check for changes to the finish or substrate before treating a larger section. Follow the cleaner’s label, including dilution, application, rinsing, and safety directions. Review coating manufacturer guidance before painting. Don’t improvise with acids or household chemicals, which may damage the substrate or affect later coating adhesion.
Choose the least intrusive method that removes the deposits without saturating the substrate. Avoid aggressive washing: it can drive salts across the wall, leave residue behind, or add moisture the surface needs to release before paint. For large areas or deposits that resist careful cleaning, NovoTech’s painting and building maintenance work takes wall condition and preparation into account before a new finish is applied.
How to Remove Efflorescence from Walls: A Step-by-Step Process
Use a controlled sequence rather than washing the whole wall at once. This limits dust, avoids unnecessary moisture, and helps reveal whether the substrate is sound enough for further preparation. Treating efflorescence before painting means removing deposits without mistaking surface cleaning for a repair to the moisture source.
Prepare the wall and remove loose deposits
Move or cover nearby items, protect floors and adjacent finishes, and ventilate the work area as conditions allow. If brushing may create dust, use suitable eye and respiratory protection. Wear gloves when handling residue or cleaning products, and follow any additional precautions specified by the product manufacturer.
- Inspect the affected area. Note the extent of the deposits and look for loose or crumbling plaster, peeling paint, damp patches, or other visible changes. Don’t brush a damaged surface aggressively.
- Dry-brush gently. Use a stiff, dry brush to lift loose salts from a dry surface. Work carefully, collecting the residue rather than sweeping it onto nearby walls or floors. Avoid sanding or forceful abrasion, which can spread dust and damage the substrate.
- Remove the collected residue. Gather it without spreading it around the room, then clean the immediate work area. If deposits remain firmly attached, don’t scrape harder. Move to a small, selective cleaning test.
Clean selectively, then check for recurrence
Use a compatible specialist cleaner only if dry brushing hasn’t removed the deposits and the product guidance supports its use on that wall material. Test an inconspicuous patch first. Follow the label for application, safety measures, and any rinsing requirements. If using a damp cloth instead, keep it lightly damp rather than soaking the wall.
- Apply the selected method to the affected area. Avoid aggressive washing, which can spread salts, saturate porous plaster or masonry, and make drying more difficult.
- Allow the wall to dry thoroughly. Drying time depends on the substrate, site conditions, ventilation, and any moisture still present. Follow product instructions and coating manufacturer guidance before proceeding with paint preparation.
- Reassess before painting. Look for returning salts, new damp patches, loose plaster, or further paint failure. Cleaning removes visible deposits; it doesn’t repair a leak, water ingress, or another active moisture source.
If deposits return, pause painting and investigate moisture before proceeding. Recurrence calls for further assessment, not another coat of paint. Widespread deposits or a deteriorating substrate may require a broader review of wall condition, moisture concerns, and preparation.

When Is a Wall Ready for Paint After Efflorescence Treatment?
Removing visible deposits is only one part of preparation. Before painting, confirm that the wall is clean, stable, sufficiently dry, and free from signs of active moisture. This readiness check helps prevent a fresh coating from hiding a problem that may undermine adhesion.
How can you tell whether the wall is dry and stable?
Inspect the whole affected area, not just the spot you cleaned. Look for returning salts, damp patches, blistering, peeling paint, soft or crumbling plaster, and other signs that moisture may still be affecting the surface. If you can’t establish the wall’s condition visually, use an appropriate moisture assessment rather than relying on appearance or touch alone. Drying time varies with the substrate, weather, ventilation, and any continuing moisture source, so a fixed waiting period doesn’t prove the wall is ready.
Use this checklist before moving on:
- No loose salts: The surface has no visible, powdery deposits that could interfere with adhesion.
- Stable substrate: Plaster and existing finishes are firm, with loose or damaged material addressed.
- Adequate dryness: The wall meets the requirements for the selected coating system and site conditions.
- No active moisture signs: There are no fresh damp patches, recurring deposits, or other indications that moisture remains unresolved.
Repeated salt deposits are a reason to investigate further, not to apply another coat. If water ingress or a leak is still affecting the wall, wait to paint until the condition has been assessed and addressed.
What primer and paint preparation should follow?
Once the substrate is suitable, remove any remaining loose material and prepare the surface according to the selected coating system. Primer and finish should be compatible with the substrate and its exposure. Review current manufacturer specifications for surface preparation, application conditions, and drying requirements. Don’t assume one primer or paint system suits every wall.
For exposed façades, coating selection should account for the wall’s condition and exposure as well as compatibility with the substrate. NovoTech’s Dubai exterior building painting guide provides broader context on façade preparation and coating choices.
A paint-ready wall results from sound assessment and preparation, not simply a clean-looking surface. NovoTech’s painting solutions include project-based support for wall preparation and painting.
When to Get Professional Help for Recurring Efflorescence Before Painting
A small area of loose salts on a dry, stable wall may be suitable for careful cleaning if there are no signs of continuing moisture or surface damage. Recurrence changes the decision. If deposits return after cleaning, pause painting while the affected wall and possible moisture pathways are assessed. Surface cleaning alone is no longer enough.
Which signs mean the moisture problem may still be active?
Look beyond the original patch. Reappearing salts, damp areas that remain, or deterioration spreading across the wall suggest the condition may be ongoing. Crumbling plaster and repeated blistering, peeling, or flaking paint also indicate that the substrate needs attention before a new coating is applied.
- Widespread deposits: Salts cover a broad area or appear in several locations.
- Persistent dampness: Patches remain damp or return after cleaning and drying.
- Substrate deterioration: Plaster is soft, loose, or crumbling.
- Repeated paint failure: New or previous coatings blister, peel, or lose adhesion in the affected area.
Base checks on the site rather than assuming one cause. Depending on the wall’s location, consider nearby plumbing, exposure to the building façade, and possible water entry around windows, doors, or other openings. A coating can conceal visible marks temporarily, but it can’t correct a leak or stop moisture entering through the building fabric. Don’t paint over unresolved symptoms.
How can a painting project address the wall as a whole?
A coordinated project begins by assessing the affected wall and recording the extent of deposits and damage. Next, investigate plausible moisture pathways and address the relevant source. Prepare the substrate only when its condition allows, then select and apply a compatible coating system according to current manufacturer guidance. The sequence matters: applying paint before the wall is suitable risks repeating the same failure.
For residential, commercial, or industrial projects in the UAE, NovoTech brings painting, renovation, and building maintenance experience to surface preparation and finishing. On exterior work in Dubai, the approach can account for façade exposure and the requirements of the selected coating system without assuming that every deposit has the same cause.
If deposits recur or damage extends beyond a small, stable area, pause painting and arrange a broader project assessment. Discuss your painting or maintenance project with NovoTech to plan the next steps around the wall’s condition.
Prepare the Wall for a More Durable Finish
Efflorescence treatment starts with understanding the wall, not simply removing its white deposits. Identify possible moisture pathways, use the least intrusive cleaning method suited to the surface, and let the wall dry before checking for loose salts, damage, or signs of continuing moisture. If deposits return or plaster is crumbling, pause painting and investigate rather than covering an unresolved condition.
How to treat efflorescence on walls before painting comes down to addressing the cause where possible, preparing a stable substrate, and choosing a compatible coating system based on the wall and its exposure. This measured approach helps set the stage for better paint adhesion.
NovoTech has operated since 1993 and brings more than 30 years of experience to residential, commercial, and industrial painting and renovation projects. As an authorized Terraco applicator, NovoTech also brings relevant application experience to coordinated surface preparation and finishing. Discuss your painting or maintenance project with NovoTech to plan a carefully prepared wall and a considered finish.
Frequently Asked Questions
Can I paint over efflorescence after brushing it off?
Only if the wall is clean, stable, adequately dry, and showing no signs of active moisture. Brushing can remove loose salts, but it doesn’t establish whether moisture is still moving through the wall. Before painting, check for returning deposits, damp patches, blistering, and crumbling plaster. If salts reappear, pause the work and investigate further. This is central to treating efflorescence before painting without trapping an unresolved problem beneath a new coating.
What is the best way to remove efflorescence from a wall?
For light, loose deposits, start with gentle dry brushing on a dry surface. Protect nearby finishes, collect the residue, and avoid sanding or forceful abrasion that could damage the wall or spread dust. If salts remain, test a small area with a suitable damp-cloth method or compatible specialist cleaner. The right choice depends on the substrate and the cleaner’s instructions. After cleaning, check for damage or returning deposits.
Should I use water or a chemical cleaner on efflorescence?
Start with dry brushing. Use limited water or a suitable specialist cleaner only if deposits resist that method. Excess water can add moisture to porous plaster or masonry, complicating drying and paint preparation. Test a cleaner on an inconspicuous patch and confirm it’s compatible with the wall material. Follow the label’s application and safety instructions, and review coating manufacturer guidance. Avoid improvised chemical mixtures or acid treatments unless product guidance permits them.
How long should a wall dry before painting after efflorescence treatment?
There isn’t one reliable drying period for every wall. The time depends on the substrate, how much moisture was introduced, ventilation, weather, and whether an underlying moisture source remains. Don’t use a fixed number of hours or days as proof that the surface is ready. Check for damp patches or returning salts, and follow the cleaning product and selected coating manufacturer’s current requirements. If visual inspection can’t establish the wall condition, use an appropriate moisture assessment.
Will efflorescence come back after I clean it?
Yes, it can return if moisture continues to carry salts through the wall. Cleaning removes visible deposits, but it doesn’t stop water entering through a façade or from a possible leak. Monitor the area for fresh powder, damp patches, or coating problems. If deposits recur, pause painting and investigate possible moisture pathways rather than repeatedly cleaning or covering the same spot. Assess the cause in context instead of assuming it from the salts alone.
Is efflorescence a sign of a serious damp problem?
Not necessarily. Efflorescence indicates that moisture has moved through a material, but the deposits alone don’t establish the source or severity. A small, stable patch may need a different response from widespread deposits accompanied by persistent dampness, crumbling plaster, or repeated paint failure. Those signs warrant a broader assessment before painting. Check the affected wall and its surroundings for possible moisture pathways, and don’t treat a visual clue as a definitive diagnosis.
Can efflorescence be treated on exterior walls in Dubai?
Yes. Exterior walls can be cleaned and prepared, but treatment should suit the wall material, condition, and exposure. In Dubai, inspect the relevant façade area and nearby openings for possible water entry without assuming a specific cause from appearance alone. Persistent deposits or damaged finishes call for assessment before coating. NovoTech undertakes exterior building painting and building maintenance projects in Dubai, considering wall condition and preparation alongside the selected coating system.