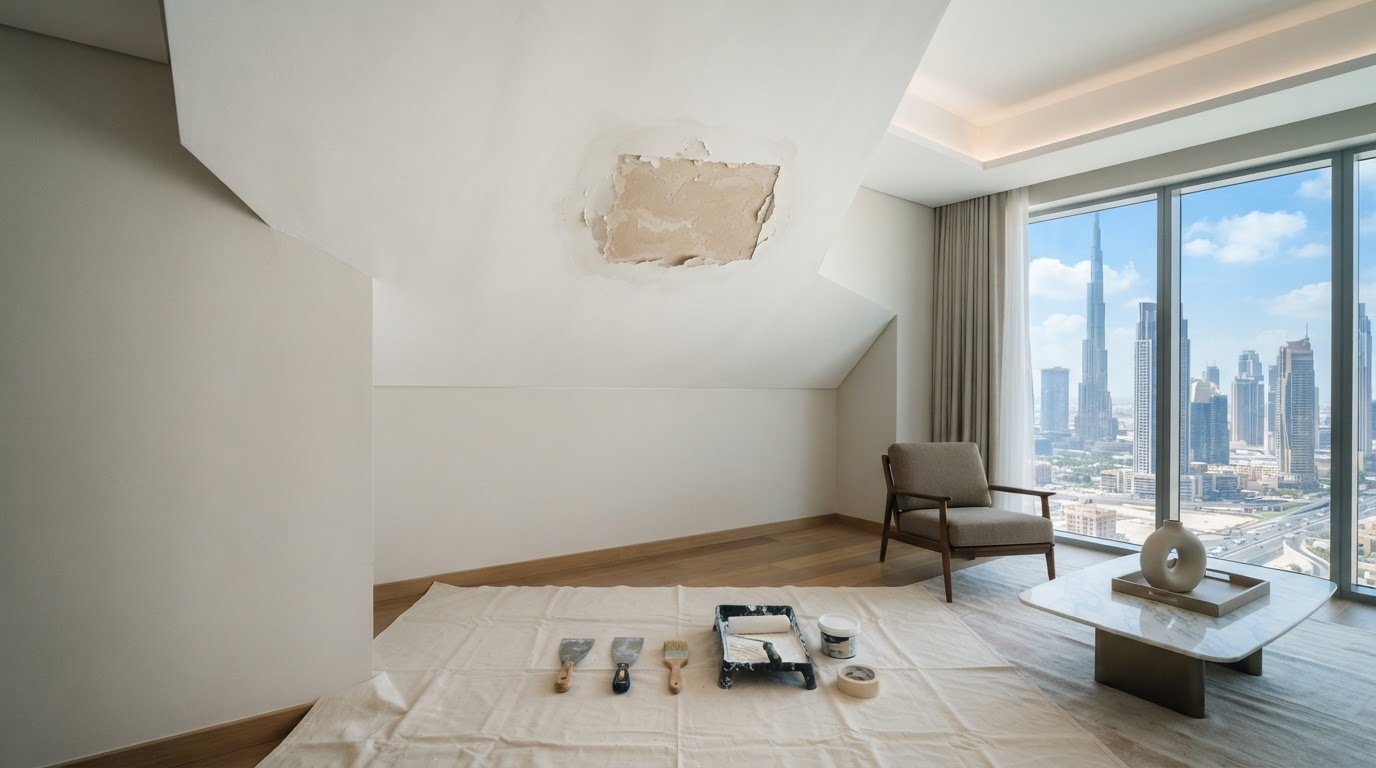
A ceiling that looks dry isn’t necessarily ready for paint. Fixing water damage on ceilings before painting in Dubai starts by controlling the leak or AC drainage issue, then confirming the ceiling has dried and remains sound. If the plaster is soft, swollen, sagging, or crumbling, painting over it won’t provide a reliable repair.
It’s understandable to want to cover a stain as soon as it fades, but paint can’t fix moisture damage. If the source is still active, staining, bubbling, or peeling may return. The condition behind the mark matters as much as its appearance.
This guide explains how to assess the likely leak and ceiling condition, when a stable surface can be patched, and when damaged material may need replacement. It also covers preparation for repainting, including removing loose coatings, cleaning, and priming the repaired area, so you can make a sound decision before work begins.
Key Takeaways
- Use the stain’s location and pattern as clues, but don’t assume they identify a plumbing or AC drainage problem on their own.
- Check whether the ceiling is firm, the coating is secure and the damage is isolated before choosing a local patch or broader replacement.
- Keep people clear of a sagging ceiling or one shedding material, and address visible movement or widening cracks before cosmetic repairs.
- For a more consistent finish, remove loose material, clean and prime the repaired area, then blend the repaint beyond the patch.
Choosing between patching, replacement, and wider repainting
Choose a repair only after controlling the moisture source and assessing the ceiling’s condition. For fixing water damage on ceilings before painting in Dubai, the key distinction is whether the surface remains stable.
Choosing Patching or Plaster Replacement
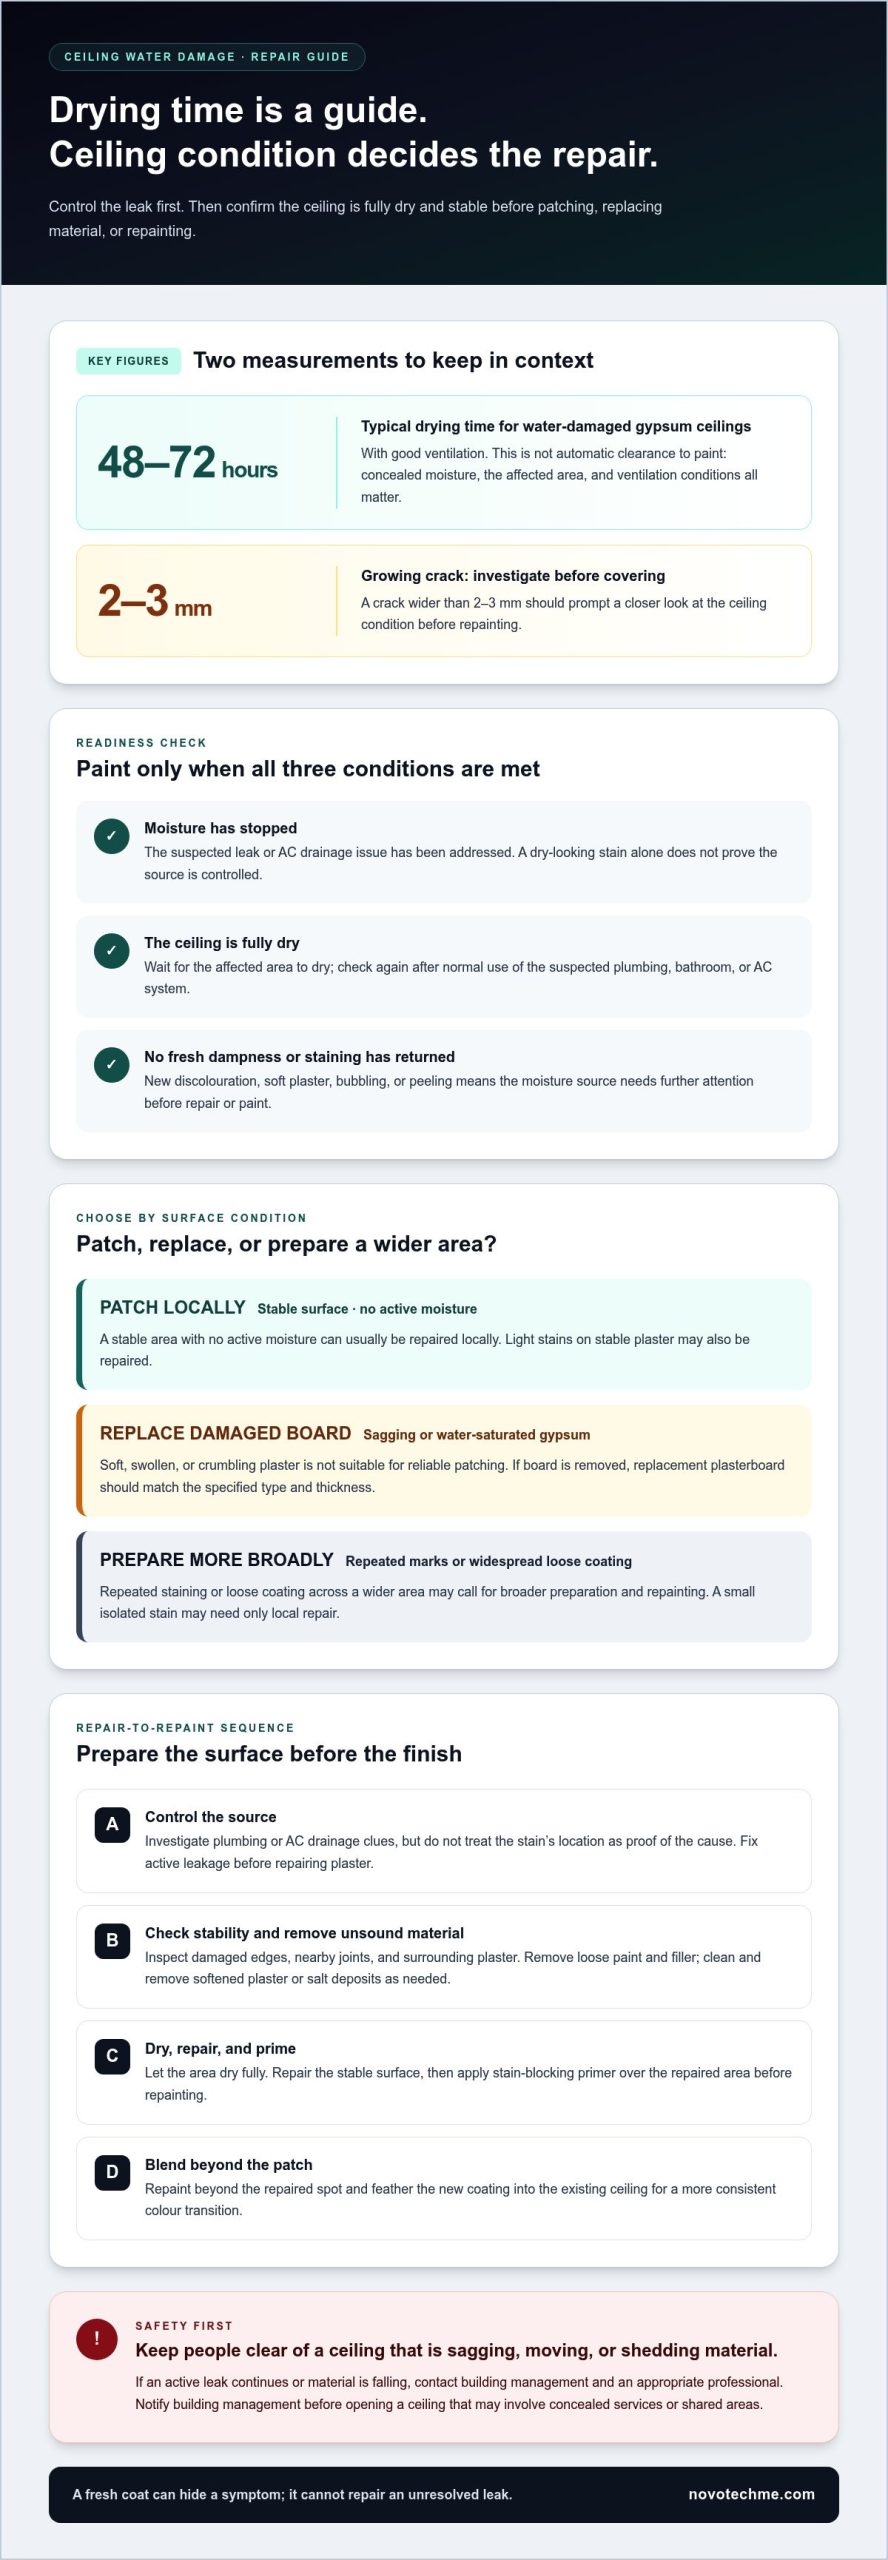
When should damaged ceiling plaster or gypsum board be replaced instead of patched? Replace sagging or water-saturated gypsum board, and treat soft, swollen, or crumbling areas as unsuitable for reliable patching. A stable surface with no active moisture can usually be repaired locally.
Inspect damaged edges, nearby joints, and surrounding plaster. If the board is removed, the replacement plasterboard should match the specified type and thickness. Loose coating, softened plaster, or salt deposits may also need to be cleaned, dried, and removed before a repair can hold.
Look beyond the stain to find the root cause. A visible mark alone can’t distinguish a plumbing leak from AC drainage. Control active leakage before repairing plaster, or moisture can damage the new patch and finish again.
Removing Stains and Repainting Affected Areas
Once the leak is fixed and the area is dry, remove loose paint and filler, then clean the ceiling surface. Light stains on stable plaster can be repaired; peeling or bubbling linked to dampness needs corrective preparation before painting. Apply stain-blocking primer over the repaired area before repainting.
Repaint beyond the patch and feather the new coating into the existing ceiling for a more consistent colour transition. A small stain may need only local repair, while repeated marks or loose coating across a wider area may call for broader preparation and repainting.
Before repainting, look for returning discolouration or fresh dampness. If a mark reappears, the moisture source may remain unresolved, perhaps because of an intermittent leak or AC drainage issue. Address the root cause first. Another layer of paint will conceal the symptom, not repair the ceiling.
Can You Repair Gypsum Ceiling Yourself?
DIY work is appropriate only when the ceiling is stable and the moisture source is controlled. Stains alone can’t identify whether plumbing or AC drainage caused the damage.
Identifying Ceiling Water Damage
Look for discolouration, peeling paint, bubbling, soft plaster, or a recurring mark. Note where each stain appears and whether it grows after AC use, bathroom use, or plumbing activity. These clues can help narrow the investigation, but a visible mark doesn’t prove which system caused it.
Before removing material, check for sagging, shedding, or movement. Keep people clear of a ceiling showing these signs, especially if an active leak continues. Notify building management about damage involving concealed services or shared building areas before opening the ceiling.
Distinguishing Plumbing and AC Leaks
A stain near an air-conditioning unit or drain route can point to condensate, while damage below a bathroom or pipe route can suggest plumbing. Neither location proves the source. A drip that changes with AC operation differs from moisture that appears after bathroom use, but both patterns need investigation.
Dubai tenants should report water damage to the landlord in writing immediately. Responsibility for repairs depends on the cause and applicable tenancy or building arrangements; a ceiling stain alone doesn’t establish whether the tenant, landlord, or upstairs neighbour is responsible. Coordinate access before repair work begins.
Drying Time and Repair Safety
Water-damaged gypsum ceilings typically need 48-72 hours of drying with good ventilation. That period isn’t a universal clearance: concealed moisture, the affected area, and ventilation conditions influence readiness. Don’t paint until the leak is controlled and the ceiling is fully dry.
Keep clear of sagging board, falling material, and any active leak; contact building management and an appropriate professional. If the ceiling is stable and dry, surface preparation can proceed. For the final finish, ceiling repainting follows repair, cleaning, and priming, not a fresh coat over damp stains.
Assessing leak source and ceiling condition before painting
A dry-looking mark doesn’t prove the leak source is controlled. Consider the ceiling dry and ready only when moisture has stopped, the surface is fully dry, and fresh staining hasn’t returned.
Checking Whether the Moisture Source Is Controlled
In an apartment, note where the stain appears and whether it changes after plumbing, bathroom, or AC use. Compare these observations with visible dampness, peeling, or bubbling. A ceiling can look dry while an intermittent leak or AC drainage issue continues above it.
Check the area again after the suspected source has been used. New discolouration or dampness means the moisture source needs further attention before plaster repair or paint. For a growing crack wider than 2-3 mm, investigate the ceiling condition before covering it.
Finding and Sealing Active Leak Sources
Trace the stain in relation to plumbing routes, bathrooms, and AC drainage, but don’t treat location as proof. Dripping above a ceiling needs prompt attention, even before a stain appears. Diagnose and control active leakage before plastering or applying a decorative finish.
Once the likely source is identified, arrange the relevant plumbing or AC drainage correction. In shared buildings, coordinate access through building management if the affected pipework or drainage may serve another unit. Replacing plaster or repainting before controlling the leak can lead to repeat damage.
Confirming the Ceiling Is Repaired and Dry
After addressing the source, watch for fresh stains, soft plaster, bubbling, or renewed peeling. Compare the ceiling’s condition with the original mark and check again after normal use of the suspected system. A returning stain signals that moisture may still be reaching the surface.
There’s no single drying period that applies to every ceiling. The affected area, concealed cavity, and ventilation all influence drying. Water-damaged gypsum needs to dry completely before repair; a surface that merely looks dry isn’t enough. Begin preparation only when the ceiling is dry and stable.
Assessing and restoring water-damaged ceilings
A reliable restoration sequence starts with inspection, not paint. Map the visible damage, assess what the ceiling material has lost, and confirm the leak is controlled before choosing a repair.
Check the area around the stain, including joints, bathroom-side edges, and nearby fixtures. Look for swelling, softened plaster, loose coating, salt deposits, or cracks. These signs help determine whether the damage can be repaired locally or failed material must be removed. Also consider the concealed ceiling cavity, where trapped moisture can persist after the visible surface appears dry.
The US EPA advises addressing water problems, drying surfaces, and not painting over mould. Follow that sequence before decorative work:
- Stop the leak source, then check whether moisture or fresh staining returns.
- Protect furniture and flooring before removing loose paint or filler.
- Clean the surface and remove failed material so the repair bonds to sound plaster.
- Allow the ceiling and any exposed cavity to dry fully before closing or finishing it.
During inspection, assess the material around the damaged section, not just the stain. Stable plaster may be patched; softened or crumbling material needs to be removed. Sagging or water-saturated gypsum board has lost structural integrity and must be replaced. Replacement board should match the specified type and thickness, with joints finished before repainting.
Prepare the repaired surface by cleaning away dust and loose residue. Apply stain-blocking primer over the repair before painting. Extend the repaint beyond the patch and feather the edge into the existing ceiling to reduce a visible colour boundary. If bathroom moisture or another leak returns, stop finishing work and address the source again.
For integrated gypsum ceiling repair and finishing, arrange restoration after the leak is controlled and the ceiling is ready for repair.
NovoTech: Exterior Building Painting Services
NovoTech provides painting solutions for ceilings and wider interior spaces once water damage has been repaired and the surface is ready for finishing. Its Interior Painting Solutions can support repainting after loose material has been removed, the ceiling is dry, and preparation is complete. For villa projects, Villa Painting & Exterior Finishes can address coordinated interior and exterior painting requirements.
For buildings requiring exterior work, NovoTech also provides Exterior Building Painting Services. The appropriate scope depends on the surfaces being painted and their condition after repairs. Contact NovoTech to discuss your painting project.
Plan the Finish Around the Repaired Ceiling
Once the ceiling is ready for its finish, consider how the repaired area will look within the room as a whole. A fresh coat can draw attention to differences in colour or sheen, so plan a consistent finish that suits the surrounding surfaces. For fixing water damage on ceilings before painting in Dubai, completing repairs before decorative work keeps the project sequence clear.
NovoTech offers Interior Painting Solutions for indoor spaces, Villa Painting & Exterior Finishes for villa projects, and Exterior Building Painting Services for building exteriors. These services can help coordinate ceiling repainting with wider property painting needs, rather than treating each surface as an isolated task.
Share the scope of your painting project with NovoTech and discuss the appropriate next step. Contact NovoTech about ceiling repairs and move forward with a clear plan for the finished space.
Frequently Asked Questions
Can I repaint a stain once it looks dry?
Not from appearance alone. A ceiling may look dry while an intermittent leak or AC drainage problem continues out of sight. Check whether the mark changes after using the suspected plumbing or AC system, and watch for new discolouration. Once the moisture source is controlled and the surface is dry, prepare the area and apply stain-blocking primer before repainting.
Patch, replace board, or repaint a larger area?
Patch a limited mark when the surrounding ceiling is firm, stable, and dry. Replace gypsum board that is sagging, water-saturated, swollen, or crumbling, because it may no longer hold a repair securely. A wider repaint can help blend the colour if a local patch would stand out. For replacement, match the board’s specified type and thickness, then finish the joints before painting.
What are the steps to repair water-damaged ceiling plaster before painting?
First, stop the leak and keep people clear if the ceiling is sagging or shedding material. Protect the floor and furniture, then remove loose paint, filler, and plaster around the damaged area. Clean the sound surface and let the ceiling dry completely. Patch stable plaster or replace weakened material, finish the repair, then apply stain-blocking primer before painting.
How do you treat ceiling stains, mold, and mildew before repainting?
Address the water problem and dry the surface before dealing with the stain; don’t paint over mould. The US EPA advises fixing water problems, drying surfaces, and avoiding paint over mould. Remove loose or failed coatings and clean the repair area before priming. If mould-like growth or dampness remains visible, postpone repainting until the moisture issue and affected surface have been addressed.
What primer and paint work best for water-damaged ceilings in Dubai?
Apply stain-blocking primer over the repaired, dry ceiling before using compatible ceiling paint. The primer helps prevent residual staining from showing through the finish. Choose paint suited to the existing ceiling surface and sheen, and extend it beyond the repair to blend the transition. No paint or primer can compensate for an active leak or damp plaster.